A Beginner’s Guide to Cellular Trail Cameras and Scouting Technology
Cellular trail cameras have changed the game for hunters, land managers, and wildlife watchers. Instead of solely relying on an SD card, these cameras connect through mobile networks to send photos and videos straight to your phone or tablet. This means you get near-instant updates on wildlife movement, property activity, or anything else your camera detects.
They’re ideal for covering wide areas, tracking patterns, or keeping an eye on remote locations. Most models produce crisp standard images great for everyday scouting, while optional HD downloads and short video clips deliver even more detail for identifying game or reviewing key moments.
How Cellular Trail Cameras Operate
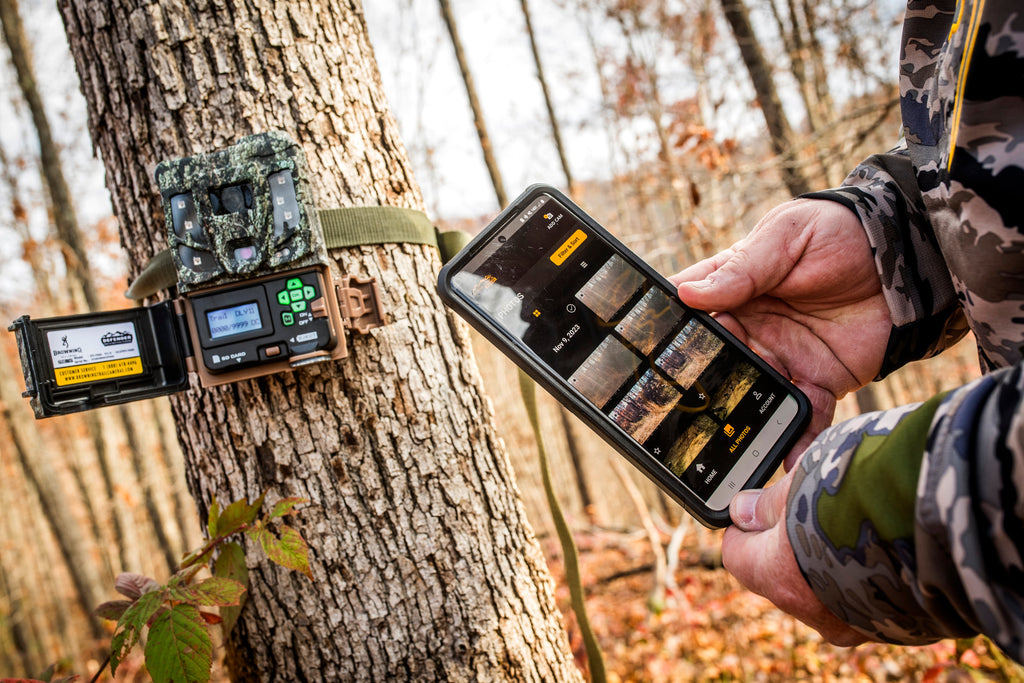
Think of a cellular trail camera as a traditional trail cam combined with a remote-monitoring system. A motion sensor triggers the camera whenever an animal, person, or vehicle passes through the detection zone. Once the camera captures an image or brief video, it sends that file through a mobile network to the companion app on your device.
Even if you don’t activate a cellular plan right away, these cameras still function like a standard SD-based trail cam, storing everything locally. This makes it easy for beginners to try the technology before paying for a subscription while still gathering useful scouting and property-monitoring data.
Higher-end models even include livestream capabilities, allowing you to watch real-time video from your property. This is especially helpful for tracking wildlife behavior, checking livestock, or monitoring access points and receiving instant awareness when something is happening.


Images from top: Craig Kavajecz, Gabriele Casini, Mike Clerkin
Understanding Cellular Trail Camera Plans
To send photos and videos to your device, the camera needs a mobile data plan. These plans differ based on the number of cameras, image volume, video usage, and whether you want access to premium features. Common plan features include:
● Battery and camera health monitoring: Get alerts when battery levels drop or a camera goes offline.
● Standard images: High-quality photos ideal for scouting, wildlife tracking, and general property observation.
● HD downloads: Optional high-resolution images for analyzing details like antler size or identifying trespassers.
● Video clips: Short segments, often around 10 seconds, that show movement and behavior.
● Livestream access: Real-time viewing for immediate, on-demand updates.
Many systems allow several cameras on the same plan, making it simple to scale your setup across multiple locations. You can also pause plans during the offseason to save money while retaining your settings.
The Strike Force Wireless App as the Central Hub
The Strike Force Wireless app serves as the command center for managing cellular trail cameras. Within the app, users can:
● Activate and manage multiple cameras across different areas
● View and organize photos, video clips, and livestream feeds
● Adjust camera settings remotely, including motion sensitivity and capture mode
● Filter images and videos to find relevant activity quickly
● Map camera locations and study travel routes
● Examine terrain, topos, and property boundaries
● Share access with trusted friends through view-only permissions
Notifications alert users when motion triggers the camera, allowing for timely responses to wildlife activity, trespassers, or property events. Advanced mapping tools give context to animal movement by showing camera placement relative to trails, water sources, and property boundaries.


Step-by-Step Guide for Beginners
- Mount Cameras Strategically: Place cameras along trails, near water sources, feeding areas, or entry points for property monitoring.
- Activate Cameras in the App: Add the camera to the app and select a cellular plan if desired.
- Set Capture Preferences: Configure motion sensitivity, image or video mode, and notification preferences.
- Monitor and Adjust: Review images and video in the app. Adjust camera placement or settings as patterns emerge.
- Explore Optional Features: Download HD images, review short video clips, or use livestream cameras for real-time property or wildlife observation.
Practical Tips for Using Cellular Trail Cameras
● Camera Placement: Position cameras along natural wildlife routes or areas with high activity to capture the most informative images and video.
● Regular Monitoring: Check the app frequently to track trends and adjust camera locations.
● Select the Right Plan: Choose a plan that matches your usage, number of cameras, and need for HD or video content.
● Suspend When Idle: Temporarily deactivate plans when cameras are not in use to save on subscription costs.
Advantages of Cellular Trail Cameras
Cellular trail cameras offer significant benefits over traditional SD card cameras:
● Real-time awareness: Receive images, video clips, and livestream feeds without visiting cameras.
● Time efficiency: Reduce trips to remote or difficult-to-access locations.
● Behavioral insight: Video clips and livestream cameras provide a deeper understanding of wildlife and animal behavior.
● Scalability: Easily manage multiple cameras on a single app or plan.
● Security and property monitoring: Monitor boundaries, livestock, or equipment remotely.
Cellular trail camera technology brings together real-time transmission, app-based control, and advanced scouting features. Whether you’re a first-time user or an experienced land manager, these tools offer powerful insight, helping you stay informed and make smarter decisions about your land, wildlife, and property.