Trail Camera Placement Tips for Early Fall Deer Scouting

As summer fades into fall, deer patterns begin to shift. Bucks are shedding velvet, food sources are changing, and movement is becoming more predictable as hunting season draws closer. For hunters, this is one of the most important times of year to gather intel, and placing your trail cameras strategically is the key to getting it right.
Whether you are scouting for opening day or just keeping tabs on the deer herd, a well-placed trail camera can give you the insights you need to make smart decisions this season.
Why Early Fall Placement Matters
Early fall is a transitional period for deer, and that transition often means opportunity. Summer feeding in fields of soybeans or alfalfa gives way to acorns, persimmons, and other natural food sources tucked back in the timber. Bucks are establishing dominance through sparring, scrapes, and rubs, while does are adjusting their feeding routines. Hunting pressure begins to build, which also influences deer movement.
Placing your cameras now allows you to:
● Spot newly formed travel routes as deer change their habits
● Identify bedding-to-feeding patterns you can use to plan hunts
● Track bucks as they shift from summer bachelor groups to their fall ranges
● Monitor when deer transition from evening field movement to more daylight activity in the woods
In short, early fall is when you can get ahead of the curve, and the right trail camera placement can make all the difference.

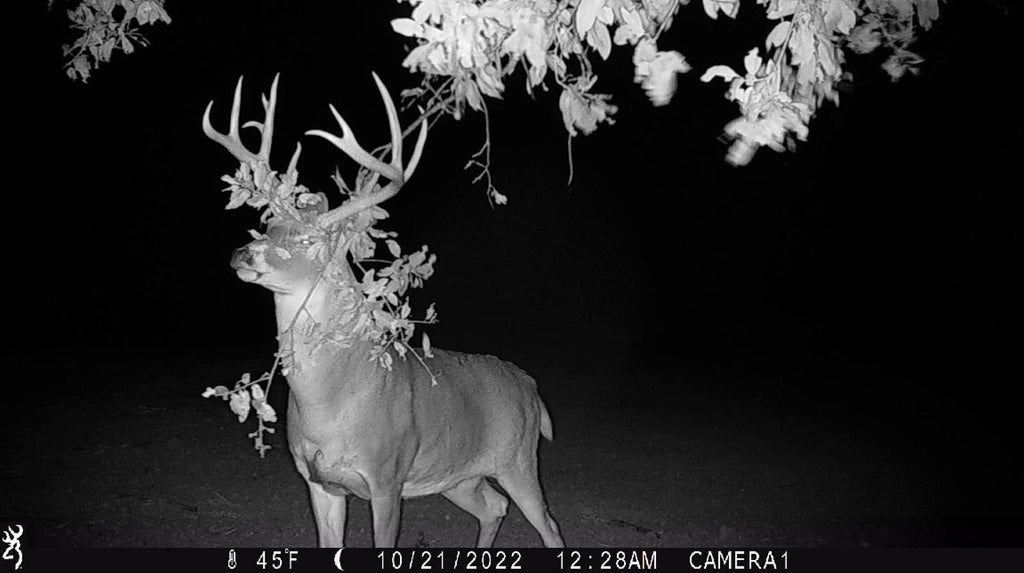
Image: Dan Pickell
Best Trail Camera Locations for Early Fall
Knowing where to put your trail cameras is just as important as having a good camera. Here are some of the most productive locations to focus on in September.
Food Sources
Deer follow their stomachs. In early fall, that often means acorn flats, persimmon groves, crop edges, and freshly cut cornfields. Position your cameras along trails leading into these areas rather than directly on the food itself. This reduces pressure on deer and still gives you reliable intel on when they are arriving and leaving.
Water Sources
Warm afternoons linger into early fall, and deer need consistent water. Setting cameras along ponds, creeks, or seeps can reveal movement you might otherwise miss, especially in drier areas where water is limited.
Funnels and Pinch Points
Terrain features such as ridgelines, saddles, fence crossings, and creek crossings funnel deer movement into predictable paths. These natural travel corridors are excellent for cameras because they give you a clear view of multiple deer using the same spo
Transition Areas
The border between thick cover and open feeding areas serves as a staging zone where deer often pause before moving out into the open. Place cameras here to monitor evening movement and catch bucks that may only briefly appear before dark.
Trail Camera Placement Tips for Success
The way you position your trail cameras can make or break your results. Follow these proven tips for the best outcomes:
● Set cameras at chest height for deer, angled slightly downward to maximize the field of view.
● Face north or south when possible to avoid glare from the rising and setting sun.
● Clear vegetation in front of the camera to prevent false triggers caused by wind-blown branches or tall grass.
● Use no glow or low glow infrared to stay undetected at night and avoid alerting mature bucks.
● Check cameras sparingly to minimize human scent and disturbance. Many hunters wait two weeks or more between card pulls.
● Use burst mode or video mode to capture more context when deer are moving quickly through the frame.
Pro tip: Consider deploying multiple cameras in different habitat types on your property. This helps you identify how deer are moving across the landscape and ensures you do not miss a shift in patterns.
Using Trail Camera Data to Pattern Deer
Placing your trail cameras is only half the battle. Knowing how to use the information they capture is what makes you successful. Here is how to interpret early fall data:
Track Time of Day
Look at when deer are moving past your cameras. Are they showing up right at last light, or is movement happening earlier in the evening? This helps you know where to hunt and when.
Identify Travel Corridors
If you consistently see deer moving from one camera location to another, you have discovered a travel corridor. These are perfect ambush points when the season opens.
Watch Food Preferences
Trail cameras reveal which food sources are hot spots at any given time. If acorns are dropping and deer suddenly stop hitting your field edge cameras, shift your scouting deeper into the timber.
Monitor Buck Behavior
As bucks leave bachelor groups, your cameras will start showing more solo movement and the beginning of rut activity, such as scrapes and rubs. This is valuable intel you can use to anticipate rut timing.

Image: Kenneth Kwasniewski
Early fall trail camera placement can be the difference between guesswork and a well-informed plan for opening day. By focusing on changing food sources, water, funnels, and transition zones, you can stay ahead of shifting deer patterns and set yourself up for success.
Trail cameras are more than just scouting tools. They are your eyes in the woods, collecting round-the-clock data that lets you hunt smarter, manage land better, and understand wildlife movement like never before.
Start fine-tuning your scouting strategy this fall with Browning Trail Cameras, and take the uncertainty out of your season.
